Enhance your space with effective soundproofing materials showcasing sleek design and functionality.

Maximizing Comfort: The Essential Guide to Soundproofing Techniques

Understanding Soundproofing Basics

Sound can be an unwelcome guest in our homes and workplaces, hindering our peace, productivity, and overall quality of life. As such, understanding the principles of Soundproofing is essential for anyone looking to create a tranquil environment. This guide will walk you through the basics of soundproofing, its mechanisms, and the materials involved, to help you tackle noise nuisance effectively.

What is Soundproofing?

Soundproofing refers to the process of blocking or reducing the transmission of sound from one space to another. It involves utilizing various techniques and materials designed to absorb, deflect, or isolate sound waves. While some may confuse soundproofing with sound absorption, the two are distinct; soundproofing aims to prevent sound from entering or leaving a space, whereas sound absorption reduces echo and reverberation within a space.

How Soundproofing Works

At its core, soundproofing works by manipulating sound waves. When sound hits a barrier, it can either be transmitted, absorbed, or reflected. High-frequency sounds tend to be absorbed more readily than low-frequency sounds. Soundproofing products take advantage of this principle by incorporating dense, heavy materials that minimize sound transmission. The effectiveness of soundproofing also relies on a tight seal around doors, windows, and any potential sound leaks, as even the smallest gaps can allow for sound passage.

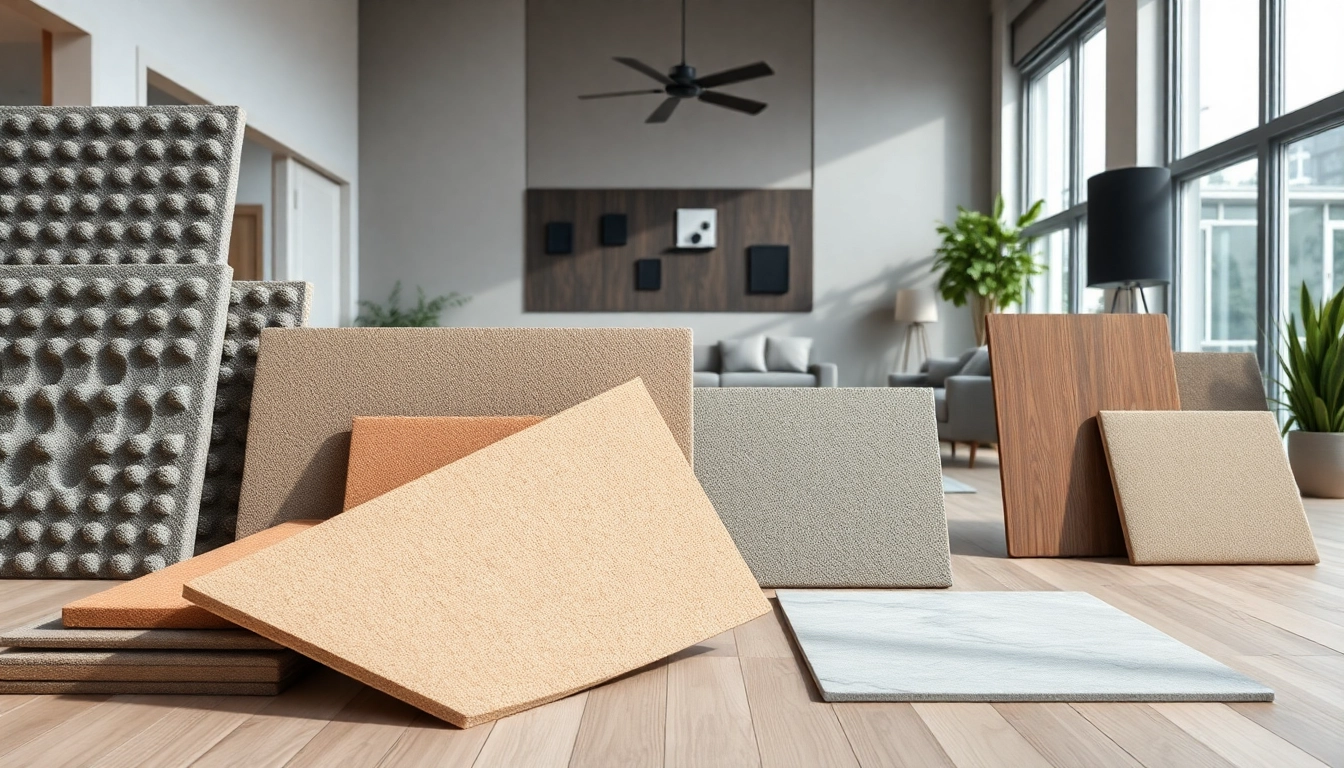
Common Soundproofing Materials

Numerous materials are available for effective soundproofing, each with unique properties. Here are some commonly used materials:

  • Mass Loaded Vinyl (MLV): A dense, flexible material that adds mass to walls and other surfaces.
  • Acoustic Foam: Designed to absorb sound waves and reduce echo.
  • Resilient Channels: Metal strips that decouple drywall from wall studs to minimize sound transfer.
  • Soundproof Drywall: Extra thick and heavy, this drywall incorporates sound-dampening materials.
  • Carpet and Underlayment: Effective at absorbing sound in floors, particularly in multi-story buildings.

Identifying Sound Problems

Before delving into soundproofing solutions, it’s crucial to identify the sources of unwanted noise and assess your space accurately. This evaluation will help you tailor a soundproofing strategy that meets your specific needs.

Common Noise Sources

Noise can originate from various sources, both internal and external. Common culprits include:

  • Traffic Noise: Urban areas often contend with the sound of vehicles, which can seep into homes.
  • Appliances: HVAC units, refrigerators, and washing machines can produce disruptive sounds.
  • Neighbors: In multi-family dwellings, sounds from adjacent units can be particularly bothersome.
  • Footsteps: In multi-story buildings, the sounds of footsteps or furniture movement can travel through floors.

Assessing Your Space

To effectively soundproof your area, conduct a thorough assessment. Walk through your home or office and identify which areas are most affected by noise. Take note of sound levels at different times of day, as well as specific activities that exacerbate the sound issue. These insights will guide your soundproofing solutions.

Impact on Well-being

Excessive noise pollution can have detrimental effects on mental health and physical well-being. Studies have shown that chronic noise exposure can lead to increased stress, anxiety, and even sleep disturbances. Moreover, a noisy environment can also affect work performance and concentration. Thus, implementing effective soundproofing solutions can significantly enhance quality of life.

Soundproofing Solutions for Homes

Transforming your residence into a quieter, more serene environment involves a variety of soundproofing techniques tailored to different structures within your home.

Wall Soundproofing Techniques

Walls are the main entry points for sound, making them a primary focus for soundproofing. Effective techniques include:

  • Adding Mass: Incorporate heavy materials like soundproof drywall or MLV to increase wall density.
  • Decoupling: Use resilient channels to separate drywall from studs, reducing sound transmission.
  • Sealing Gaps: Apply acoustical caulk around electrical outlets, baseboards, and any wall penetrations to eliminate leaks.
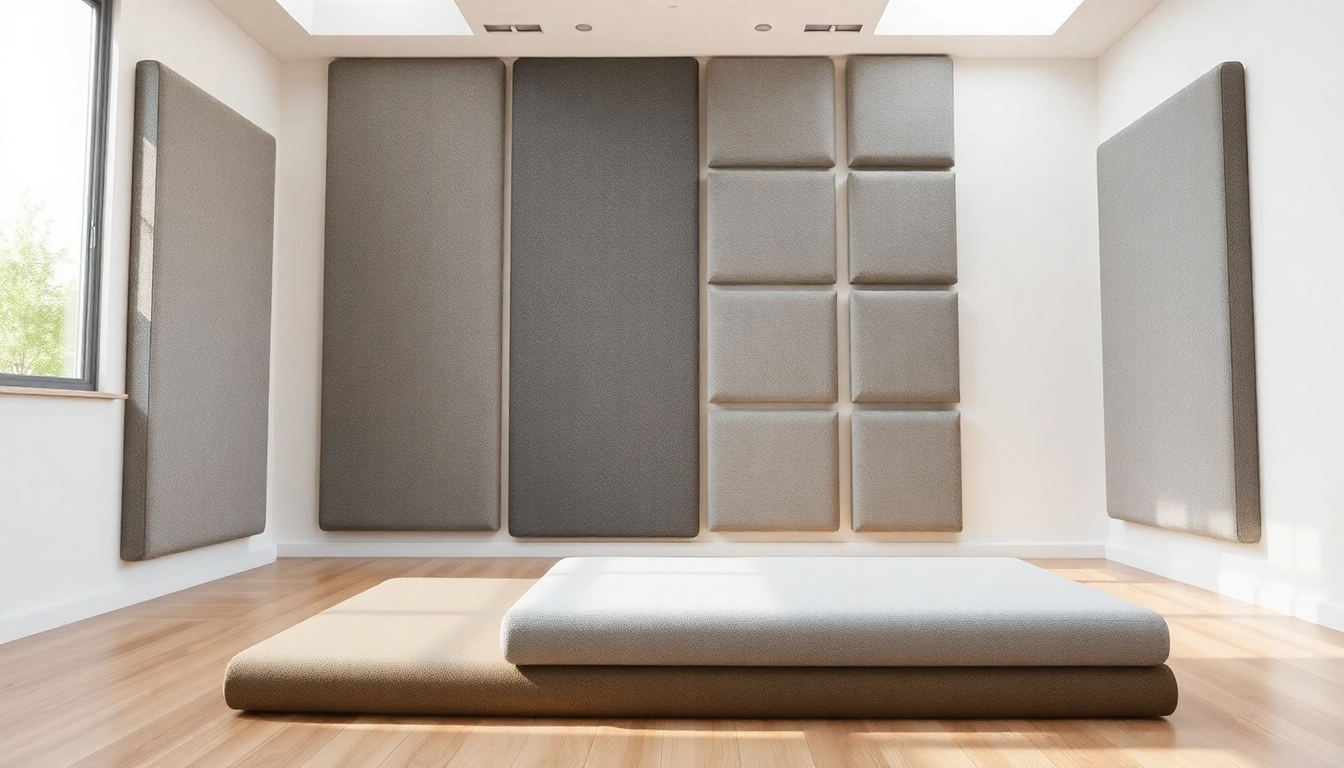
  • Acoustic Panels: Install decorative acoustic panels to absorb sound and improve aesthetics.

Floor Soundproofing Methods

Sound transmission through floors can be particularly disruptive, especially in multi-story buildings. Consider the following methods:

  • Carpet and Padding: Thick carpets with quality padding can significantly reduce noise.
  • Soundproof Underlayment: Add a layer of soundproof material beneath hardwood or tile floors to dampen sound.
  • Floating Floors: Install floors that do not directly touch the subfloor, using rubber or air-filled materials to create isolation.

Ceiling Soundproofing Solutions

Ceiling soundproofing is crucial in preventing noise from traveling between floors. Implement these strategies:

  • Acoustic Tiles: Install acoustic ceiling tiles designed to absorb sound and reduce echoes.
  • Double Layer Drywall: Use two layers of drywall with sound-dampening adhesive to create a thicker barrier.
  • Insulation: Incorporate soundproof insulation in ceiling cavities to minimize sound transmission.

Commercial Soundproofing Strategies

Commercial spaces often require tailored soundproofing solutions to maintain productivity and create a conducive work environment. Strategies vary by type of space but share common goals of managing noise effectively.

Noise Control in Offices

In office environments, an open layout can amplify noise disruption. Effective strategies include:

  • Noise-Reducing Partitions: Install partitions made from sound-dampening materials to create quieter areas.
  • Soft Furnishings: Use rugs, curtains, and fabric-covered furniture to absorb sound.
  • Quiet Zones: Designate quiet areas for focused work away from high-traffic sections.

Soundproofing in Studios

Studios require exceptional soundproofing to ensure clear audio quality during recording. Consider the following:

  • Soundproof Booths: Construct booths with thick walls and sufficient sound insulation.
  • Floating Floors: Use floating floors to eliminate vibrations that affect recordings.
  • Acoustic Treatment: Apply acoustic panels throughout the space to manage sound reflections and echoes.

Best Practices for Public Spaces

Managing noise in public spaces requires strategic planning and construction techniques. Here are some best practices:

  • Soft Surfaces: Incorporate carpets, curtains, and upholstered furniture to absorb sound.
  • Acoustic Panels: Use panels on walls and ceilings to mitigate noise in high-traffic areas.
  • Sound Masking Systems: Implement systems that generate ambient sound to reduce auditory distractions.

Evaluating Soundproofing Effectiveness

Once soundproofing solutions have been implemented, it’s crucial to evaluate their effectiveness and make any necessary adjustments.

Measuring Sound Levels

Utilize a sound level meter to measure ambient noise levels before and after soundproofing measures. This instrument quantifies noise exposure in decibels (dB), allowing for a clear comparison of sound reduction effectiveness. Aim for a reduction of at least 5 dB to notice a significant difference in noise perception.

Making Adjustments Based on Results

If sound levels remain problematic, reassess your soundproofing measures. Explore additional soundproofing materials, reinforce seals, or layer existing solutions to boost effectiveness. Consultation with an acoustics professional can also provide tailored recommendations based on your specific noise challenges.

Long-term Maintenance and Upkeep

Soundproofing is not a one-time task; it requires ongoing maintenance. Regular checks for gaps, wear, and degradation of materials can help maintain effectiveness. Consider replacing outdated soundproofing materials and addressing any new noise sources as environments change.

FAQs About Soundproofing

What is the best soundproofing material?

The best material depends on your needs. Mass Loaded Vinyl, soundproof drywall, and acoustic foam are top options for home soundproofing.

Can I soundproof my apartment without permission?

You may need permission for significant changes, but adding rugs, curtains, or wall hangings typically doesn’t require it.

How effective is soundproofing?

With proper materials and techniques, soundproofing can significantly reduce noise levels, often by 5 dB or more.

Will soundproofing help with loud neighbors?

Yes, effective soundproofing can dampen noise from neighbors, making it less intrusive and easier to manage.

Is soundproofing expensive?

Cost varies by method and materials used. Simple DIY projects can be affordable, while professional installations tend to be pricier.

Empowered campers using EcoFlow portable power stations for charging devices amid nature.

Power Your Adventures with EcoFlow: The Ultimate Portable Energy Solution

Understanding Portable Power: The Role of EcoFlow

The Basics of Portable Power Units

In an increasingly mobile world, the demand for portable power solutions has surged. Portable power units are compact, self-contained systems designed to store and provide electrical energy for various applications, from camping trips to emergency backup systems. At the forefront of this evolution is EcoFlow, a brand that embodies innovation in battery technology and energy solutions. Unlike traditional power sources, these units are designed to offer convenience, making them essential for outdoor enthusiasts, remote workers, and anyone needing energy on the go. They typically feature lithium-ion batteries, which are lighter, more efficient, and longer-lasting than their lead-acid counterparts.

Key Features of EcoFlow Products

EcoFlow products come equipped with cutting-edge technology that sets them apart in the crowded portable power market. Here are some of the standout features:

  • Rapid Charging: EcoFlow devices can be charged in hours, not days, thanks to advanced battery technology.
  • Multiple Output Ports: They offer a range of outlets including AC, USB-C, USB-A, and DC ports, allowing users to power multiple devices simultaneously.
  • Lightweight Design: Despite their power capacity, EcoFlow units are designed for easy transport, often with handles or wheels.
  • Smart Technology: Many models feature app connectivity for remote monitoring and control.
  • Solar Compatibility: EcoFlow products can be paired with solar panels, extending their usability in off-grid scenarios.

Benefits of Using EcoFlow for Outdoor Activities

For outdoor adventurers, EcoFlow offers unparalleled advantages:

  • Reliable Power Supply: Whether you need to charge a phone, run a refrigerator, or power tools, EcoFlow ensures reliability in the wild.
  • Portability: Their compact size means you can take them almost anywhere, making them ideal for camping, hiking, and road trips.
  • Environmental Friendliness: With options for solar charging, users can enjoy sustainable energy, reducing their ecological footprint.
  • Emergency Preparedness: Beyond recreation, these units are invaluable during power outages, providing essential electricity when traditional sources fail.

How EcoFlow Compares to Other Power Solutions

Portability: Why Size Matters for EcoFlow

When choosing a portable power solution, portability is paramount. EcoFlow excels with units designed to maximize power while minimizing bulk. Their various models cater to different needs without compromising on weight or ease of transport. The design philosophy prioritizes user experience in outdoor settings, ensuring that users can easily carry and manage their power needs without the burden of heavy equipment.

Efficiency and Battery Life of EcoFlow

One of the most compelling aspects of EcoFlow products is their efficiency. The lithium-ion batteries not only provide higher energy density but also possess a lower self-discharge rate, which minimizes energy loss. Additionally, EcoFlow products feature advanced battery management systems that extend battery life significantly, making them a financially wise investment in the long run.

Real-World Performance: User Testimonials

User testimonials provide insight into the practical performance of EcoFlow units. Many outdoor enthusiasts commend how these power stations operate seamlessly during extended camping trips, powering everything from smartphones to electric coolers. Users frequently highlight the quick recharge capabilities and versatility of the units, reporting quick transitions between powering multiple devices without sacrificing performance.

Choosing the Right EcoFlow Model for Your Needs

Identifying Your Power Requirements

When selecting an EcoFlow model, it’s essential to assess your power needs carefully. Consider the devices you intend to charge and their wattage requirements. A smartphone, for instance, might only need 5 watts, while a laptop may demand 60-100 watts. Understanding these needs will guide you in choosing the right EcoFlow unit that can handle your requirements without falling short.

Comparing EcoFlow Models: A Quick Guide

EcoFlow offers various models tailored for different energy needs:

  • EcoFlow River: Ideal for short trips, featuring up to 600W output and lightweight design.
  • EcoFlow Delta: Perfect for users needing more capacity with options for higher output and multiple simultaneous charging.
  • EcoFlow Delta Pro: A powerhouse for serious users, providing 3,600W output with solar charging capability.

Each model features unique characteristics targeting various user scenarios, whether for casual use or more intensive energy demands.

Tips for Maximizing EcoFlow Performance

To ensure optimal performance from your EcoFlow unit, consider the following tips:

  • Charge the unit before it drops below 20% to maintain battery health.
  • For solar models, position solar panels for maximum sun exposure to achieve faster charging rates.
  • Use devices with lower wattage where possible to extend the overall usage time of the power station.

Setting Up and Using EcoFlow Power Stations

Unboxing Your EcoFlow: First Steps

The unboxing experience sets the tone for your EcoFlow journey. Upon receiving your unit, ensure you check the contents thoroughly, including all cables and accessories. Familiarize yourself with the product manual—it often contains valuable information on optimal use. Initial setup generally involves charging the unit fully before first use to calibrate the battery accurately.

Connecting Devices: A How-To Guide

Connecting devices to your EcoFlow is straightforward:

  1. Identify the type of device you wish to power (AC, USB).
  2. Connect the appropriate cable from the EcoFlow to your device.
  3. Power on the EcoFlow to start charging your device.

This ease of connectivity allows for smooth transitions between different devices, enhancing your overall experience whether in the wild or during a power outage.

Safety Precautions When Using EcoFlow

Safety should be a priority when operating any electronic device. Here are some precautions to consider:

  • Always ensure connections are secure to prevent damage or energy loss.
  • Avoid using the EcoFlow in excessively hot or humid environments to protect the battery life.
  • Regularly inspect cables for wear or damage before use.

EcoFlow Maintenance and Troubleshooting

Routine Maintenance Tips for Longevity

Regular maintenance extends the life of your EcoFlow. Here are best practices for keeping your unit in top condition:

  • Clean the exterior with a dry cloth to remove dirt and moisture.
  • Store the unit in a cool, dry place when not in use.
  • Perform battery checks periodically to ensure optimal performance.

Common Issues and Easy Fixes

Users may encounter some common problems, but many have simple fixes. If your unit isn’t charging, check the connections and ensure they are secure. Overheating can occur if the unit is placed in direct sunlight for long periods; simply move it to a shaded area. Lastly, if the display appears frozen, a quick reset may resolve the issue.

When to Seek Professional Help with EcoFlow

If you encounter persistent issues that basic troubleshooting cannot resolve, it may be time to consult a professional. This includes situations like constant charging failure, error messages that persist after resets, or physical damage to the unit. Ensuring that you consult with a certified service provider can prevent further damage and maintain your unit’s warranty.

Frequently Asked Questions

What is EcoFlow’s warranty policy?

EcoFlow offers a standard warranty for their products that typically covers defects in materials and workmanship for a specified period. Always check your specific model for details.

Can I use EcoFlow in my home?

Yes, EcoFlow products are versatile and can be used at home as backup power sources for essential devices during outages.

How long does it take to charge an EcoFlow unit?

Charging times vary by model but generally range from 1-4 hours when using wall outlets. Solar charging may take longer depending on sunlight conditions.

Are EcoFlow units safe to use indoors?

Yes, EcoFlow units are safe for indoor use as they have built-in safety features to avoid overheating and ensure efficient operation.

How do I know which EcoFlow model to choose?

Assess your power needs by considering the devices you will charge and their wattage. This helps you select the right model for optimal performance.

Cabinet Refacing Clearwater FL in a beautifully renovated kitchen showcasing sleek cabinetry.

Enhance Your Space with Cabinet Refacing Clearwater FL: Modern Solutions for a Fresh Look

Understanding Cabinet Refacing Clearwater FL

What is Cabinet Refacing?

Cabinet refacing is a transformative approach utilized by homeowners to update the appearance of their kitchen cabinets without the high costs associated with a complete replacement. This process involves removing the existing cabinet doors and drawer fronts, and replacing them with new ones, while keeping the original cabinet structure intact. The visible surfaces of the cabinets are then covered with a veneer or laminate, allowing for a fresh, modern look. By opting for Cabinet Refacing Clearwater FL, homeowners can enjoy a remarkable change in aesthetic appeal with minimized disruption to their daily routines.

Benefits of Cabinet Refacing

The benefits of cabinet refacing extend beyond just aesthetics. Here are some compelling reasons to consider this option:

  • Cost-Effective: Refacing is typically less expensive than a full kitchen remodel. Homeowners can achieve a high-end look without breaking the bank.
  • Quick Implementation: The refacing process can generally be completed within a few days, making it a more immediate solution compared to extensive renovations.
  • Less Waste: By reusing the cabinet boxes and simply updating the fronts and finishes, cabinet refacing is a more sustainable option, reducing landfill waste.
  • Customized Choices: Homeowners can pick from a variety of styles, colors, and finishes, allowing for a personalized kitchen that suits their taste.
  • Increased Home Value: An updated kitchen attracts potential buyers, boosting the overall value of the home.

Ideal Kitchen Styles for Refacing

Cabinet refacing is suitable for a wide range of kitchen styles. Here are a few designs where refacing can yield significant improvements:

  • Traditional: In a traditional kitchen, refacing can enhance the classic elegance of wood cabinetry with rich stains or painted finishes.
  • Modern: For modern kitchens, sleek, high-gloss finishes or minimalist designs can provide a contemporary upgrade.
  • Cottage: A cozy cottage-style kitchen can benefit from soft hues and textured finishes, giving it a warm and inviting feel.
  • Farmhouse: Refacing with distressed wood or shaker-style doors can emphasize the rustic appeal of a farmhouse kitchen.

Essential Steps in the Cabinet Refacing Process

Initial Consultation and Planning

The cabinet refacing journey begins with a thorough consultation. Homeowners should discuss their vision, preferences, and budget with a professional. The planning stage includes measuring the existing cabinets and assessing any structural repairs needed. Expert advice can also guide homeowners in choosing styles and finishes that align with their kitchen’s overall design and functionality.

Choosing Materials and Styles

Once the planning stage is complete, the next step is selecting suitable materials and styles. Choices for cabinet doors and finishes can vary widely:

  • Doors: Homeowners can choose from solid wood, MDF, or laminate for their cabinet doors.
  • Finishes: Options may include paint, stain, or even specialty finishes like glazing or distressing.
  • Hardware: Selecting handles and knobs that complement the new look is essential for completing the transformation.

These selections ultimately influence the style and feel of the kitchen.

Installation Process Overview

The installation is where the magic happens. The professional team will start by removing the old cabinet doors and drawer fronts. Next, they apply the new veneer to the cabinet boxes, ensuring a seamless appearance. New doors and drawer fronts are then installed, followed by the desired hardware. The entire process is precise to guarantee that the cabinets not only look beautiful but function well.

Cost Considerations for Cabinet Refacing Clearwater FL

Typical Pricing Factors

The cost of cabinet refacing can vary based on several factors, including:

  • Material Selection: Higher quality materials will increase overall costs, while budget-friendly options may reduce expenditure.
  • Cabinet Size and Layout: Larger kitchens with more cabinets naturally incur higher costs.
  • Custom Features: If homeowners desire custom cabinetry or specialized finishes, prices can escalate accordingly.

Typically, homeowners can expect to spend between 30% to 50% of the cost of a new kitchen installation.

Budgeting Tips for Homeowners

To effectively budget for cabinet refacing, homeowners should:

  • Obtain multiple quotes to understand the market rate.
  • Prioritize which aspects are most important, such as material quality or design features.
  • Allocate a contingency budget for unexpected expenses during the installation process.
  • Consider timing the project during off-peak seasons for potentially lower rates.

With careful planning, homeowners can achieve their desired kitchen look without exceeding their budget.

Comparing Costs with Full Kitchen Remodel

When considering whether to reface cabinets or undergo a full kitchen remodel, it is essential to note the stark difference in pricing. A full remodel can introduce costs ranging from $20,000 to $50,000 or more, while refacing typically falls between $3,000 to $12,000, depending on the choices made. This significant cost difference, paired with a quicker turnaround time for refacing, makes it an appealing alternative for many homeowners looking for a fresh kitchen update without the extensive disruption.

Frequently Asked Questions about Cabinet Refacing

How Long Does Cabinet Refacing Take?

The average cabinet refacing project typically takes between 3 to 5 days, depending on the size of the kitchen and the complexity of the work involved.

Can I Change My Cabinet Layout?

Cabinet refacing focuses on changing the fronts and finishes. If layout changes are desired, a full remodel may be necessary.

What Types of Finishes Are Available?

Available finishes include paints, stains, glazes, and specialty options like distressed or high-gloss surfaces to suit various styles.

Is Cabinet Refacing Eco-Friendly?

Yes, because it reuses the cabinet structure, reducing the amount of waste compared to a complete tear-out. It’s a sustainable choice for environmentally-conscious homeowners.

Will Refacing Work on Any Cabinets?

Refacing works best on solid and structurally sound cabinets. If the cabinets are damaged or unstable, repair or replacement may be necessary.

Finding the Right Professionals in Clearwater FL

Researching Local Experts

Finding qualified professionals for cabinet refacing involves thorough research. Homeowners should start by checking online reviews and ratings for local cabinet refacing companies. Recommendations from friends or family can also provide insights into reliable contractors. Additionally, checking for certifications and associations related to woodworking and remodeling can further ensure quality service.

Avoiding Common Pitfalls in Hiring

It’s crucial for homeowners to avoid common pitfalls when hiring refacing professionals, such as:

  • Choosing based solely on price without considering quality and reputation.
  • Not asking for a detailed written estimate that outlines the scope of work, materials used, and timelines.
  • Failing to check references or view examples of previous work done by the contractors.

By taking a diligent approach, homeowners can secure skilled contractors who will ensure a successful project.

Questions to Ask Your Contractor

Before hiring a contractor, it’s essential to ask several pertinent questions, including:

  • What is your experience with cabinet refacing?
  • Can you provide references from previous clients?
  • What warranty or guarantee do you offer on your work?
  • What materials do you recommend and why?
  • How do you handle unexpected issues that arise during the project?

The answers to these questions can provide invaluable insight into the contractor’s reliability and expertise.

Install a mini split ac unit efficiently in a cozy modern living room for optimal comfort.

Enhancing Home Comfort with Mini Split AC: A Comprehensive Guide

The Basics of Mini Split AC Systems

What is a Mini Split AC?

A mini split ac system is a versatile and efficient heating and cooling solution that does not require ductwork. This system consists of an outdoor unit that houses the compressor and condensing unit, and one or more indoor units that deliver the conditioned air directly into the living space. Its design offers significant freedom in installation, making it an ideal choice for both residential and commercial properties.

Advantages of Mini Split AC Systems

Mini split AC systems offer numerous advantages over traditional HVAC systems. Firstly, they are highly energy-efficient, often providing better performance at lower energy costs. Unlike central air conditioning systems, mini splits eliminate the energy losses associated with ductwork, which can account for over 30% of energy consumption in some homes. Additionally, mini split AC units are known for their quiet operation, making them suitable for bedrooms, offices, and any other spaces where noise might be a concern.

Another compelling advantage is the flexibility in installation. Mini split systems are available in various sizes and configurations, allowing homeowners to customize their cooling and heating solutions to their specific needs. Moreover, the zoning capability allows each indoor unit to be set to different temperatures, ensuring personalized comfort for everyone in the household. Finally, their aesthetic appeal, with sleek and compact designs, allows them to seamlessly blend into the room’s decor.

How Mini Split AC Works

Understanding how a mini split AC system works can aid in appreciating its efficiency. These systems operate on a heat pump technology, allowing them to either cool or heat a room. The outdoor unit absorbs heat from the air and transfers it to the indoor unit via refrigerant pipes. This exchange takes place through the processes of evaporation and condensation. In summer, the system removes heat from the indoors and releases it outside, while in winter, it extracts heat from the outside air to warm the indoors. This mechanism is highly efficient, as it moves heat rather than generating it, leading to lower energy consumption.

Choosing the Right Mini Split AC for Your Home

Factors to Consider When Selecting a Mini Split AC

When selecting the ideal mini split AC, several factors must be taken into account. One of the primary considerations is the square footage of the space being cooled or heated. An inaccurately sized system will lead to inefficiency and discomfort. Additional factors include the climate zone of your location, the room’s thermal insulation, ceiling height, number of windows, and the overall number of occupants. All these elements will influence the cooling demand and assist in determining the correct capacity of the unit.

Energy Efficiency Ratings Explained

Energy efficiency is a crucial aspect when selecting a mini split AC. The most common measurement for heating and cooling efficiency is the Seasonal Energy Efficiency Ratio (SEER) for cooling and the Heating Seasonal Performance Factor (HSPF) for heating. A higher SEER or HSPF rating indicates a more efficient system. For optimal energy conservation, look for units with a SEER rating of 15 or above. Energy Star-certified models are also a great choice, as they meet strict efficiency guidelines.

Sizing Your Mini Split AC Unit Appropriately

Proper sizing of a mini split AC unit is essential for effective operation. An undersized unit may struggle to cool the space adequately, while an oversized unit can lead to frequent cycling, reducing efficiency and increasing wear and tear. To adequately size a mini split, professionals often recommend performing a Manual J load calculation, which considers various factors such as room size, insulation, sun exposure, and air infiltration rates. This calculation helps you choose a unit with an appropriate BTU (British Thermal Units) rating to meet your cooling and heating needs efficiently.

Installation of Mini Split AC Systems

Essential Tools for Installation

Successfully installing a mini split AC system requires a specific set of tools. Common tools include a level, drill with appropriate bits for wall-mounted units, screwdrivers, wrenches, refrigerant gauges, and a vacuum pump. Depending on the installation environment, additional tools may be necessary, such as a pipe cutter for refrigerant lines and a ladder for the outdoor unit placement. Furthermore, safety equipment such as gloves and goggles is crucial to ensure safe handling of equipment and materials.

Steps to Install Your Mini Split AC

The installation of a mini split AC involves several crucial steps. First, select an optimal location for both the indoor and outdoor units. The indoor unit should be mounted high on an interior wall for efficient air distribution; avoid placing it above electronic devices or sources of heat. Second, run the refrigerant lines, the power cable, and the condensate drain hose between the indoor and outdoor units, ensuring to follow local building codes.

Next, secure the indoor unit in place and connect the refrigerant lines, ensuring proper sealing to prevent leaks. After connecting the outdoor unit to the refrigerant lines and power supply, perform a vacuum test to eliminate any trapped air. Finally, start the system and check for leaks. It’s recommended to consult the manufacturer’s manual for specific reference, as installation procedures can vary by model.

Common Pitfalls During Installation

Even though installing a mini split AC system can be accomplished by a handy homeowner, several common mistakes can occur. One pitfall is not properly sealing the refrigerant line connections, which can lead to leaks and decreased efficiency. Furthermore, improper placement of the indoor unit can result in inadequate airflow and heating. Neglecting to perform a vacuum test can also result in compressor failure. If unsure, hiring a professional installer can mitigate these risks and ensure correct setup.

Maintenance Tips for Mini Split AC Systems

Regular Cleaning and Filter Maintenance

Routine maintenance of your mini split AC system is vital for optimal performance and longevity. Cleaning or replacing filters every month during peak season is essential to maintain airflow and efficiency. To clean the filters, simply remove them from the indoor unit and wash them with mild soap and water before air-drying thoroughly. Additionally, the indoor unit should be wiped down regularly to prevent dust accumulation, and the outdoor unit must be kept clear of debris, such as leaves or snow, that could obstruct airflow.

Signs of Potential Issues in Mini Split AC Units

Awareness of the signs of potential issues with a mini split AC unit can save you from costly repairs. Watch for unusual noises, such as grinding or rattling, which might indicate mechanical problems. If the system is not cooling efficiently or air is not flowing from the vents, it may signal a refrigerant leak or a blocked filter. Moreover, if you notice an increase in energy bills without an increase in usage, your unit may require maintenance or inspection.

When to Seek Professional Help

Knowing when to call for professional help is crucial to maintaining your mini split AC system. If you have little to no knowledge of HVAC systems, seeking an expert’s help for installations, repairs, or extensive maintenance checks is advisable. Additionally, if your unit experiences issues such as persistent leaks, dramatic temperature fluctuations, or a malfunctioning thermostat, expert diagnosis may be required to ascertain the underlying problem.

Maximizing Efficiency and Performance

Optimal Temperature Settings for Mini Split AC

Finding the right temperature setting can vastly improve your mini split AC system’s energy efficiency. Generally, it is recommended to set your thermostat to around 75°F during the cooling season, balancing comfort with energy bill savings. For heating, a temperature setting of 68°F is suitable for winter months. Furthermore, utilizing programmable thermostats or apps can help schedule temperature changes to match your home occupancy patterns.

Energy-Saving Practices with Mini Split AC

Implementing energy-saving practices can significantly enhance the efficiency of your mini split AC system. Use shades or blinds to block direct sunlight during peak hours and keep doors and windows closed while the system is in operation. Regular maintenance, including cleaning filters and coils and clearing debris from outdoor units, minimizes energy use. Additionally, consider utilizing ceiling fans or natural ventilation for balanced airflow and comfort during milder weather conditions.

Monitoring Your Mini Split AC Performance

Regularly monitoring your mini split AC system’s performance can help identify issues before they become costly repairs. Utilize energy monitors to track usage and efficiency, and perform visual checks for any signs of wear or damage. Keeping a log of monthly temperatures and energy bills can reveal significant patterns, filtering out potential problems in efficiency. With proper monitoring and timely maintenance, the life span of your mini split AC system can be maximized.

What is a mini split AC system?

A mini split AC system is a ductless cooling and heating solution that consists of an outdoor compressor and indoor units, providing efficient temperature control.

What are the benefits of a mini split AC?

Mini split AC systems offer energy efficiency, quiet operation, and flexible installation options, making them an excellent choice for both homes and offices.

How do I choose the right size mini split AC?

To choose the right size, consider your room’s square footage, insulation, and the local climate to ensure effective cooling and heating.

Can I install a mini split AC myself?

While some may attempt DIY installation, it is recommended to hire a professional to avoid mistakes and ensure proper function and warranty coverage.

How often should I maintain my mini split AC?

Regular maintenance is essential; clean or replace filters monthly and schedule professional servicing at least once a year to ensure optimal performance.

Offering reliable cleaning services calgary, a team works efficiently in a bright office environment.

Top-Tier Cleaning Services Calgary for a Spotless Home and Office

Understanding Cleaning Services Calgary

What Are Cleaning Services?

Cleaning services encompass a variety of professional cleaning solutions tailored to residential and commercial spaces. These services range from basic housekeeping tasks, such as dusting, vacuuming, and laundry, to more specialized offerings like deep cleaning, post-construction cleanup, and janitorial services for businesses. What’s essential is that these services are carried out by trained professionals equipped with the knowledge, skills, and tools necessary to achieve optimal cleanliness. By leveraging cleaning services calgary, residents and business owners can free themselves from the physical and mental burden of cleaning, allowing them to focus on more important aspects of their lives.

Benefits of Hiring Professionals

Engaging professional cleaning services in Calgary comes with numerous benefits. First and foremost, it saves time. Individuals and business owners can allocate hours spent on cleaning to enhance productivity or leisure. Additionally, professional cleaners use advanced cleaning techniques and tools, ensuring a higher standard of cleanliness than typical DIY methods. Ultimately, hiring professionals enhances the overall health and safety of a space—by effectively eliminating dust, allergens, and bacteria that an average person might overlook.

Differentiating Service Types

Within the cleaning industry, there are numerous types of services tailored to different needs. Regular residential cleaning is the most common, involving routine tasks performed weekly or bi-weekly. However, for deeper cleanings, one-time deep cleaning services focus on areas not typically covered during routine cleanings, ensuring a thorough sanitizing of your entire space. Other specialized services include move-in/move-out cleaning, commercial cleaning for offices, carpet cleaning, and upholstery cleaning, catering to unique scenarios and requirements.

Factors to Consider When Choosing Cleaning Services Calgary

Experience and Expertise

When selecting a cleaning service, it’s crucial to consider their experience and expertise within the industry. Look for companies that have been established for several years and have a track record of successful service deliveries. Experienced cleaners will understand the best cleaning practices for different surfaces and materials, and they are often equipped to handle a variety of cleaning products safely and effectively.

Customer Reviews and Testimonials

Another essential factor is the feedback from previous clients; customer reviews and testimonials provide insights into the quality and reliability of a service. Look for reviews highlighting efficiency, thoroughness, and professionalism. Positive reviews can reinforce confidence in a company’s capability, while negative reviews may signal potential issues. Analyzing ratings on trusted platforms can guide you in making an informed decision.

Pricing and Service Packages

Cost is always a consideration when hiring cleaning services. Compare the pricing structures of different providers and examine what is included in their service packages. Some companies may offer a flat rate for general cleaning, while others have variable pricing based on the size of the area or the complexity of the cleaning tasks. Understanding what you receive for the price ensures you find a service that fits your budget while still meeting your cleaning needs.

Common Challenges in Cleaning Services Calgary

Managing Allergies and Sensitivities

Ensuring the health and safety of family members, especially those with allergies or sensitivities, is paramount when hiring cleaning services. Careful selection of cleaning products is necessary, as some can exacerbate allergies or create toxic environments. When engaging with a cleaning service, inquire about the products they use and whether they offer hypoallergenic options to mitigate potential health risks.

Understanding Service Limitations

Every cleaning service has its limitations. It is important to communicate openly about your cleaning expectations and understand what specific tasks a company can or cannot perform. For instance, while some providers may specialize in deep cleaning, they may not address exterior spaces or offer window washing. Knowing the boundaries of the services offered will help set realistic expectations and foster a satisfying partnership.

Finding Trustworthy Providers

In a market filled with various cleaning companies, finding trustworthy providers can be challenging. Conduct thorough research, utilizing online platforms, personal recommendations, and referrals. Additionally, ensure that the company is licensed, insured, and bonds its cleaners to protect yourself from potential damages or theft while work is being performed within your premises.

Best Practices for Hiring Cleaning Services Calgary

Assessing Needs Before Contacting

Before reaching out to a cleaning service, assess your specific needs. Consider the size of the area, the types of cleaning required, and your desired frequency of services. Preparing this information will help service providers offer tailored solutions that match your requirements and ensure you’re on the same page from the start.

Verifying Insurance and Certifications

Before hiring, ensure the cleaning company has adequate insurance coverage. This protects you from potential legal liabilities and damages resulting from accidents that may occur during the cleaning process. Additionally, check for certifications that indicate adherence to industry standards, which can further reinforce trust in the cleaning service you choose.

Conducting Interviews or Consultations

Don’t hesitate to conduct interviews or consultations with prospective cleaning services. This provides an opportunity to discuss your expectations, gauge their responsiveness, and identify their level of professionalism. A reputable company will be willing and able to address your concerns while demonstrating transparency about pricing and service offerings.

Frequently Asked Questions About Cleaning Services Calgary

What types of cleaning services are available?

Many types of cleaning services are available, including residential cleaning, commercial cleaning, deep cleaning, window washing, and specialized cleaning for carpets and upholstery.

How do I determine the right service for my needs?

Assess your specific cleaning requirements and preferences, then consult with providers for recommendations that best match your situation and frequency of cleaning needed.

Are cleaning products safe for my family and pets?

Many cleaning services use eco-friendly and hypoallergenic products, but it’s essential to inquire directly about the specific products used to ensure they are safe for your family and pets.

What can I expect during a cleaning service?

You can expect thorough cleaning based on the agreed-upon tasks, professionalism from the cleaning staff, and the use of appropriate tools and products for effective cleanliness.

How do I find reputable cleaning services in Calgary?

Research online for reviews, ask for recommendations from friends or family, and verify licenses and insurance to identify reputable cleaning services in Calgary.

Installing metal roofing vancouver on a modern home with professionals showing craftsmanship.

Enhance Your Property Value with Metal Roofing Vancouver Solutions

Introduction to Metal Roofing Vancouver

Metal roofing is rapidly becoming a preferred choice for homeowners and builders in Vancouver due to its durability, energy efficiency, and aesthetic appeal. As a result, understanding the unique characteristics and benefits of metal roofing vancouver is crucial for anyone considering this roofing option.

What is Metal Roofing?

Metal roofing refers to roofs made from metal pieces or tiles that come in a range of materials including steel, aluminum, copper, and zinc. These roofs can be installed in various styles and are known for their longevity and resistance against harsh weather conditions, making them an ideal option in Vancouver’s diverse climate.

Benefits of Metal Roofing Vancouver

Metal roofing offers several benefits, particularly suited to the needs of Vancouver residents.

  • Durability: Metal roofs can last anywhere from 40 to 70 years, significantly outlasting traditional asphalt shingles.
  • Energy Efficiency: With reflective properties, metal roofing can reduce cooling costs by up to 25% in hot months.
  • Fire Resistance: Metal roofs are non-combustible, significantly enhancing the safety of a home against fire hazards.
  • Low Maintenance: They require minimal maintenance, offering long-term savings and convenience for homeowners.
  • Eco-Friendliness: Many metal roofing materials are made from recycled materials and are fully recyclable at the end of their life cycle.

Choosing the Right Material

In Vancouver, various metal materials are suitable for roofing, with the most common being galvanized steel and aluminum. Steel offers strength and affordability, while aluminum is lightweight and resistant to corrosion, particularly beneficial in coastal areas. Consider factors like climate, budget, and aesthetic preference when choosing the right material for your metal roofing project.

Installation Process of Metal Roofing Vancouver

The installation of metal roofing ensures the longevity and performance of the material. Understanding the process can help homeowners prepare and make informed decisions.

Preparation and Safety Measures

Before installation, it’s essential to prepare adequately. This includes selecting a qualified contractor, obtaining necessary permits, and ensuring that the building structure can support the new roof. Safety measures for workers include using safety harnesses, protective eyewear, and appropriate tools to avoid injuries during the installation process.

Step-by-Step Installation Guide

  1. Remove Old Roofing: Carefully strip away any existing roofing material, repairing any damage to the underlying structure.
  2. Install Underlayment: Lay down a water-resistant barrier to protect against moisture.
  3. Measure and Cut Metal Panels: Precision is key; panels should be cut according to the roof’s dimensions.
  4. Install Panels: Start from the eaves and work upwards, ensuring proper overlap to prevent leaks.
  5. Secure Fasteners: Use appropriate screws or clips to secure the metal sheets, adhering to manufacturer guidelines.
  6. Finish Trim Work: Install trim pieces around edges, valleys, and peaks for a polished look.

Common Challenges During Installation

Some of the common challenges during installation include weather interruptions, misalignment of panels, and inadequate flashing, which can lead to leaks. It’s crucial to communicate with your contractor regarding potential challenges and mitigation strategies. Regular inspection during installation can catch issues early, ensuring a robust final product.

Cost Factors of Metal Roofing Vancouver

The cost of installing metal roofing in Vancouver can vary significantly based on material choice, roof size, and complexity of the job. Understanding these factors can help homeowners budget effectively.

Material Costs Overview

Material prices can range from $3.25 to $14 per square foot, depending on the type of metal chosen. Aluminum might be on the higher end due to its corrosion resistance, while galvanized steel can be more affordable. Always consider the long-term values when assessing the cost of materials.

Labor Expenses Breakdown

Labor costs typically range from $1.00 to $2.50 per square foot, influenced by the contractor’s expertise, the complexity of the roof, and the local market demand. Obtaining detailed quotes from multiple contractors ensures competitive pricing.

Long-Term Investment Value

Although the upfront costs of metal roofing may be higher than conventional options, the long-term savings in repairs, reduced insurance premiums, and energy efficiency result in a wise investment. Homeowners can expect to recover a significant portion of their investment should they decide to sell the property in the future.

Maintenance Tips for Metal Roofing Vancouver

Proper maintenance can extend the lifespan of your metal roof. Here are some essential tips to consider.

Routine Inspection Steps

Conduct annual inspections of the roof, especially after severe weather events. Look for loose panels, rust, or damage to flashing. Addressing these issues promptly can prevent costly repairs down the line.

Cleaning Techniques for Longevity

To maintain its aesthetic and functional qualities, clean the roof at least once a year. Use a soft-bristle brush and a mild detergent solution to remove dirt and debris. Avoid harsh chemicals that may damage the metal coating.

Sunscreen and Coating Options

Consider applying a protective coating to enhance UV resistance and prevent rust. This practice not only protects the roof but also can improve energy efficiency by reflecting sunlight away from the home.

FAQs About Metal Roofing Vancouver

How long does metal roofing last?

Metal roofing typically lasts between 40 to 70 years, making it a long-term investment compared to traditional roofing materials.

What finishes are available for metal roofing?

Common finishes include galvanized, galvannealed, and painted coatings, which offer varying levels of corrosion resistance and aesthetic appeal.

Is metal roofing noisy during rain?

When properly installed with adequate insulation and underlayment, metal roofing should not be excessively noisy during rain or hail.

Can I install metal roofing over existing shingles?

Generally, yes. However, it is always best to remove old shingles to ensure a solid base and avoid any trapped moisture.

What warranty options are available for metal roofing?

Warranties vary by manufacturer but typically cover 20 to 50 years, depending on the metal type and finish.

Soundproofing materials artistically arranged to highlight their effectiveness and aesthetic appeal.

Achieving Optimal Soundproofing: Effective Techniques and Materials

Understanding Soundproofing Basics

What is Soundproofing?

Soundproofing refers to the methods and materials used to reduce or eliminate sound transmission between spaces. It involves sound insulation that minimizes noise pollution, providing a quieter and more comfortable living or working environment. Effective soundproofing can help block external noises, reduce echo, and improve the overall acoustic quality of a given space. By strategically employing various techniques and materials, one can significantly decrease the sound experienced in both commercial and residential settings.

Why is Soundproofing Important?

The importance of soundproofing cannot be overstated. In our increasingly noisy world, excessive sound can lead to stress, reduced productivity, and health issues. Implementing Soundproofing measures creates a serene environment that enhances focus, relaxation, and overall well-being. Moreover, soundproofing can improve property value, giving homeowners and businesses an edge in property transactions. Consider the implications of noise disruptions in environments such as offices, schools, and hospitals, where peace and concentration are crucial.

Common Soundproofing Myths

Dispelling myths surrounding soundproofing is crucial for making informed decisions. One common myth is that soundproofing is only necessary in noisy neighborhoods. In reality, even quieter environments can benefit from soundproofing to manage indoor echo and improve sound clarity. Another misconception is that soundproofing is prohibitively expensive. While costs can vary, many cost-effective solutions are available. Lastly, some believe that merely adding insulation is sufficient for soundproofing, while in fact, a comprehensive approach often yields the best results, incorporating various techniques and materials.

Soundproofing Techniques for Homes

Acoustic Panels and Their Benefits

Acoustic panels are essential tools for improving sound quality in any space. They are engineered to absorb sound waves, reducing echo and enhancing the clarity of sounds. Acoustic panels are versatile and can be installed in various applications, from home theaters to recording studios. They come in different materials and designs, making it easy to integrate them into any decor. Additionally, these panels can be an aesthetic addition to walls, serving both functional and decorative purposes.

Using Soundproof Windows

Soundproof windows are another highly effective method for minimizing noise infiltration. Traditional windows can allow a significant amount of sound to pass through, negating the benefits of other soundproofing measures. Replacing single-pane windows with double or triple-pane options can dramatically reduce noise. Manufacturers often enhance these windows with special sealants and gas fills that improve insulation and sound attenuation, making them a smart investment for homeowners looking to create quiet living spaces.

Soundproofing Doors and Entryways

Doors are critical points for sound leakage, as they often leave gaps that can let sound travel through. To effectively soundproof doors, it can be beneficial to invest in solid core doors, which offer better sound resistance than hollow-core models. Additionally, installing door sweeps and soundproofing seals around the edges can prevent noise from escaping or entering. For more extreme situations, specialized soundproof doors are available, designed to reduce sound transmission significantly.

Materials Used in Soundproofing

Types of Soundproofing Insulation

Various insulation materials contribute significantly to soundproofing efforts. Fiberglass insulation is commonly used due to its sound-absorbing capabilities and affordability. Rock wool insulation offers excellent sound and thermal resistance, making it suitable for walls and ceilings. Additionally, cellulose insulation made from recycled paper is another environmentally friendly option that provides effective sound dampening. Choosing the right type of insulation depends on specific soundproofing needs and building structures.

Evaluating Mass-Loaded Vinyl

Mass-loaded vinyl (MLV) is a heavy, yet flexible material that acts as an excellent sound barrier. Often used in walls, floors, and ceilings, MLV is particularly effective in reducing low-frequency sounds, making it ideal for home theaters or recording studios. When evaluating MLV, it’s essential to consider the thickness and mass of the material to determine its effectiveness. Proper installation will also influence how well the material performs, emphasizing the need for an accurate measurement and fitting process.

Other Innovative Soundproofing Materials

Innovative soundproofing materials are constantly emerging to address various sound issues more effectively. Green glue, for example, is a damping compound applied between two layers of drywall to reduce sound transmission dramatically. Acoustic foam is another option, with its open-cell structure designed to absorb sound waves efficiently. Additionally, soundproofing curtains, made with denser fabrics, offer a degree of sound reduction while also contributing to thermal insulation, enhancing energy efficiency in homes.

Installation Steps for Effective Soundproofing

Preparing Your Space

Before diving into soundproofing installation, preparing the space is vital. Start by identifying the primary sources of noise and evaluating which areas require the most attention. Clear the area of furniture and distractions to create a clean workspace. Assess the condition of walls, floors, and ceilings; repairing any structural issues beforehand will ensure more effective soundproofing results. Taking the time to prepare reduces future complications and improves the final outcome.

DIY Soundproofing Tips

Many soundproofing techniques can be implemented as DIY projects, making them accessible for homeowners. For example, adding weatherstripping to doors and windows can significantly reduce sound leakage. Another simple method includes using mass-loaded vinyl or acoustic panels that can be installed on walls without professional help. Additionally, rearranging furniture to create buffer zones for sound absorption is a quick and effective solution that doesn’t require any significant investment.

When to Hire a Professional

While many soundproofing efforts can be tackled independently, there are scenarios where hiring a professional is beneficial. If the sound issues are extensive or involve structural elements, such as soundproofing between multiple units, engaging an expert ensures that the installation follows best practices. Professionals have the experience and equipment to diagnose acoustic problems accurately and implement solutions efficiently. Ultimately, it can save time and expenses in the long run.

Measuring the Effectiveness of Soundproofing

Acoustic Performance Metrics

To evaluate soundproofing effectiveness, understanding acoustic performance metrics is essential. Important metrics include Noise Reduction Coefficient (NRC), which measures sound absorption, and Sound Transmission Class (STC), which indicates how well a building partition attenuates airborne sound. Higher STC ratings correlate with better soundproofing outcomes. Familiarizing oneself with these metrics helps homeowners and builders understand which materials and methods will best suit their specific needs.

Tools for Measuring Sound Reduction

Several tools can assist in measuring sound reduction within a space. Sound level meters can record decibel levels before and after implementing soundproofing measures, providing quantitative data to assess improvements. Additionally, acoustic analysis software can simulate sound behavior in a room, allowing for informed decisions before construction. Investing in these tools ensures that soundproofing efforts deliver tangible results, optimally creating serene spaces.

Adjusting Your Soundproofing Strategy

Monitoring the effectiveness of soundproofing measures allows for adjustments when needed. If sound levels remain high after implementation, it’s important to reevaluate the measures taken. This may involve adding more materials, improving installation methods, or combining various soundproofing techniques. Regular assessments will help optimize results and ensure long-term performance, fulfilling the ultimate goal of creating a tranquil environment.

FAQs About Soundproofing

1. What is the best method for reducing noise in my home?

The best method often involves a combination of acoustic panels, soundproof windows, and door seals to comprehensively reduce noise infiltration.

2. How much does soundproofing typically cost?

Cost can vary widely based on materials and methods chosen, ranging from basic DIY options to professional installation, potentially costing several thousand dollars.

3. Can soundproofing materials be installed in any room?

Yes, soundproofing materials can be installed in virtually any room, including those with existing structures, though specific approaches may differ based on the room’s purpose.

4. Is soundproofing effective against all types of noise?

Soundproofing is more effective against certain types of noise, particularly airborne sounds like voices and music, while some measures may not significantly reduce impact sounds.

5. How long do soundproofing materials last?

Longevity varies by material; however, most soundproofing materials can last many years with proper installation and maintenance, continually providing noise reduction benefits.

Long distance movers Calgary efficiently loading a moving truck under bright sunlight.

Reliable Long Distance Movers Calgary: Your Comprehensive Guide to Seamless Relocation

Understanding Long Distance Movers Calgary

What Constitutes Long Distance Moving?

Long distance moving typically refers to relocating your belongings across a distance exceeding 300 miles, often involving boundary crossings between provinces or states. Unlike local moves, which are typically limited to within city borders, long distance moves require careful planning and coordination. This can encompass multiple logistical challenges, such as the distance, transport methods, and timing. Understanding the nuances of long distance moving helps ensure a smooth transition to your new location.

Benefits of Hiring Professional Movers

Opting for professional long distance movers Calgary provides numerous advantages that ease the stress of relocating. Firstly, experienced movers have the expertise and knowledge to handle various aspects of the move, thus minimizing risks associated with damage to your belongings. Additionally, they provide essential services such as packing, loading, and unloading, freeing up your time to focus on other important matters. Their access to specialized equipment can ensure safe transportation of heavy or delicate items, which might be challenging for individuals without the right tools.

What to Expect from Long Distance Movers Calgary

When you hire long distance movers, you can expect comprehensive moving services tailored to your requirements. These services often include:

  • Free estimates: Many movers offer preliminary assessments to provide you with an accurate cost and timeline.
  • Packing and unpacking: Professional packing ensures that your items are secure during transit.
  • Storage solutions: If there are gaps between your moving dates, many companies provide storage facilities for your belongings.
  • Real-time tracking: Keeping you informed on the status of your move.

Being aware of these offerings can assist you in selecting the most suitable mover for your needs.

Choosing the Right Long Distance Movers Calgary

Key Factors to Consider

When selecting a long distance moving company, assess several critical factors:

  • Licensing and insurance: Ensure the company is licensed and insured for your peace of mind.
  • Reviews and testimonials: Researching past customer experiences provides insight into the mover’s reliability and service quality.
  • Experience: Companies with extensive experience in long distance moves are often more efficient.
  • Service offerings: Examine the range of services available to cater to your specific moving needs.

Evaluating Moving Companies

Choosing a moving company requires careful evaluation. Start by gathering quotes from multiple providers to compare rates. Additionally, look into their professional affiliations, such as memberships in moving associations, which can indicate industry standards. One of the most telling indicators of a company’s performance is customer feedback. Use platforms like Google Reviews or the Better Business Bureau to gauge satisfaction levels. Reaching out to previous clients can also offer firsthand insights into the moving process.

Cost Factors for Long Distance Moves

Understanding the various cost components associated with long distance moving can help you manage your budget effectively. Key factors include:

  • Distance: The longer the distance, the higher the cost due to fuel and time.
  • Volume of items: The more belongings you have, the more it will cost to transport them.
  • Additional services: Services like packing, loading, and storage come at an extra cost.
  • Seasonality: Moving during peak times may lead to increased rates.

Thoroughly discussing costs upfront with your moving company can prevent unexpected charges later on.

Preparing for a Long Distance Move

Creating a Moving Checklist

A moving checklist is an invaluable tool in ensuring nothing is overlooked during your relocation. Start by listing out tasks such as sorting through belongings, deciding what to keep, donate, or discard, and arranging for utilities and services at your new home. Include deadlines for each task and monitor progress to stay organized. Using digital tools or apps can streamline this process, allowing easy access and adjustment to your checklist. A well-crafted checklist not only reduces stress but also ensures a timely and efficient move.

Packing Tips for Long Distance Moves

Proper packing is essential when moving long distances. Here are some tips to ensure your items arrive intact:

  • Use quality packing materials: Invest in sturdy boxes, bubble wrap, tape, and packing paper.
  • Label boxes: Clearly label each box with its contents and destination room to ease unpacking.
  • Protect fragile items: Wrap delicate items in bubble wrap or cushioning, and place them in boxes with extra padding.
  • Disassemble larger items: Take apart furniture to save space and make handling easier.

By following these packing tips, you can significantly minimize the risk of damage to your belongings during transit.

Common Moving Myths Debunked

Myths about long distance moving can lead to unnecessary stress and confusion. Some common misconceptions include:

  • All movers are the same: Quality and service levels can vary greatly between companies.
  • DIY moving is cheaper: While it may seem economical, hidden costs can quickly add up.
  • It’s easy to pack loose items: Without proper packing, loose items are prone to damage in transit.
  • Insurance is optional: It’s crucial to consider coverage options to protect your valuables.

Being informed about these misconceptions ensures you approach your move with accurate expectations.

Post-Move Considerations

Unpacking Efficiently

Efficient unpacking makes settling into your new home a smoother process. Begin with essential items to set up your daily living environment. Focus on one room at a time to avoid feeling overwhelmed. Consider utilizing a color-coded labeling system to identify where each box belongs, making it easier to find specific items during the unpacking process. Establishing a clear space for unpacking can also help organize your workflow, allowing you to settle in quickly and effectively.

Settling into Your New Home

Integrating into a new environment can feel daunting, but establishing connections can ease the transition. Start by exploring your neighborhood and locating essential services like grocery stores, pharmacies, and hospitals. Engage with your neighbors and local community through events or gatherings. This not only fosters a sense of belonging but can provide support as you adjust to your new surroundings. Taking these steps can significantly enhance your overall experience in your new home.

Maintaining Quality Connections

Moving long distances may strain existing relationships, but there are ways to maintain connections. Utilize digital tools for virtual meet-ups and schedule regular check-ins with friends and family. Social media also offers opportunities to share your new experiences, keeping connections alive. Look for local groups or clubs that share common interests to build new relationships and networks in your new area. By making an effort to connect, you can nurture both new and established relationships effectively.

FAQs about Long Distance Movers Calgary

What are the typical costs associated with long distance moves?

The cost of long distance moves varies based on distance, volume, and services but typically ranges from $1,000 to $5,000.

How do I prepare my belongings for a long distance move?

Start by decluttering, then securely pack items using quality materials and label boxes for easy identification.

What insurance options are available when moving?

Most movers offer basic coverage; however, you can purchase additional insurance for valuable items.

How far in advance should I book my movers?

It’s best to book your long distance movers at least 4-6 weeks in advance, especially during peak seasons.

What should I do if my belongings are damaged during the move?

Document the damage and contact your moving company ASAP to file a claim per their insurance policy.

Showcasing EcoFlow power station in a sleek home, reflecting innovation and modern design.

Elevate Your Power Needs with EcoFlow: Efficient Solutions for Modern Living

Understanding EcoFlow and Its Benefits

What is EcoFlow?

EcoFlow is a leading provider of portable power solutions that leverage cutting-edge battery technology to meet the needs of modern users. Whether you’re camping in the great outdoors, facing a power outage at home, or looking to reduce your energy costs, EcoFlow offers a range of products designed to enhance your power accessibility. Their innovative power stations provide a versatile alternative to traditional generators, outfitted with features that make them ideal for a myriad of applications. If you’re seeking efficient and reliable power solutions, explore the capabilities of EcoFlow.

Key Features of EcoFlow

EcoFlow devices boast several standout features that differentiate them from traditional power sources:

  • Rapid Recharge: Unlike conventional generators that may take hours to refuel, EcoFlow products charge quickly, often within an hour, making them ready for use when you need them.
  • Compact Design: Built for portability, EcoFlow stations are lightweight and easy to carry, allowing for convenient storage and transportation.
  • Multiple Output Options: With a variety of ports including USB, AC, and DC outputs, EcoFlow devices can power everything from small gadgets to larger appliances.
  • Advanced Battery Management: These devices are equipped with Smart Battery Management Systems that optimize battery life and performance, offering users more reliable service.

Advantages Over Traditional Power Sources

Switching to EcoFlow provides numerous advantages over traditional power sources such as gas generators:

  • Environmentally Friendly: EcoFlow devices operate on clean energy, helping to reduce your carbon footprint compared to fossil fuel-based generators.
  • Noise Reduction: Silent operation is another major benefit; unlike generators that produce disruptive sounds, EcoFlow devices work quietly, making them perfect for recreational activities and residential use.
  • Cost-Effective: With no fuel costs and minimal maintenance, EcoFlow can lead to considerable long-term savings compared to the upkeep of a traditional generator.

Innovative Uses of EcoFlow Products

EcoFlow in Outdoor Activities

Outdoor enthusiasts can significantly enhance their camping or hiking experiences with EcoFlow products. These devices allow users to run camping lights, charge smartphones, and power portable refrigerators, all while being off the grid. The lightweight nature and robust capacity of EcoFlow devices ensure that adventurers can stay connected and enjoy comforts typically reserved for home.

Emergency Preparedness with EcoFlow

In emergency situations, having a reliable power source is critical. EcoFlow products can serve as a backup during outages, powering essential devices like medical equipment or communication tools. Their user-friendly interface and quick charging capabilities allow families to remain prepared for any unforeseen circumstances, ensuring that they can maintain comfort and safety during emergencies.

Home Energy Solutions Featuring EcoFlow

EcoFlow can also play a significant role in home energy management. With the integration of solar panels, EcoFlow devices can provide sustainable energy solutions for homeowners. This setup not only reduces reliance on the grid but also contributes to overall electricity savings, making it an excellent choice for those looking to innovate their energy consumption practices.

Choosing the Right EcoFlow Device for You

Factors to Consider When Selecting EcoFlow

When selecting an EcoFlow device, consider the following factors:

  • Power Needs: Assess your power requirements based on the devices you intend to use. This will guide you in choosing the appropriate capacity.
  • Portability: If you’re using the power station for travel or outdoor purposes, ensure it is lightweight and easy to transport.
  • Recharge Options: Look for devices that provide multiple ways to recharge, including solar, AC, and car charging, for maximum flexibility.

Popular EcoFlow Models Overview

EcoFlow offers several popular models to cater to different needs:

  • EcoFlow Delta: Known for its high capacity and rapid charging, this model is ideal for powering multiple devices simultaneously, perfect for family outings or emergency backup.
  • EcoFlow River: This smaller model is incredibly portable while still providing substantial power, making it suitable for weekend trips or lightweight needs.
  • EcoFlow Delta Mini: A compact version of the Delta with reduced weight but efficient performance, designed for casual users who prioritize convenience.

Customer Reviews and Experiences with EcoFlow

Customers frequently praise EcoFlow for its reliability and performance. Many highlight the quick charging capabilities and portability that make these devices invaluable for outdoor adventures. Positive user experiences also emphasize peace of mind regarding emergency preparedness, with several reviews noting that EcoFlow products exceeded expectations during power outages.

Installation and Setup of EcoFlow Devices

Step-by-Step Guide to Setting Up EcoFlow

Getting started with EcoFlow is straightforward. Here’s a step-by-step guide:

  1. Unboxing: Carefully unpack your EcoFlow device and check for all listed components.
  2. Charge the Device: Before first use, fully charge the power station using the AC charger or solar panel.
  3. Connect Devices: Use the appropriate ports to connect your devices ensuring compatibility for power output.
  4. Power On: Switch on the device and monitor the power levels via the display panel.

Common Issues and Troubleshooting

While EcoFlow devices are designed for ease of use, you may encounter some common issues:

  • Device Won’t Charge: Ensure that all connections are secure and that you’re using the correct charger.
  • Power Output Issues: Check if the total load exceeds the power capacity of the device; ensure no devices draw excessive power.
  • Temperature Warnings: If the device overheats, discontinue use and allow it to cool before restarting.

Safety Guidelines While Using EcoFlow

To ensure safe operation of EcoFlow devices:

  • Always use EcoFlow-approved charging equipment.
  • Do not expose the device to extreme weather conditions, including rain or snow.
  • Regularly inspect the device for wear and tear, ensuring all ports and connections remain clean.

Maximizing Efficiency with EcoFlow

Energy Efficiency Tips for EcoFlow Users

To ensure optimal use of your EcoFlow power station:

  • Schedule Usage: Use high-demand appliances during peak sunlight hours when recharging via solar panels.
  • Minimize Load: Disconnect devices that are not in use to save power.
  • Store Energy Wisely: If possible, charge the battery during off-peak hours to maximize efficiency and cost savings.

Integrating EcoFlow into Smart Home Systems

Integrating EcoFlow devices into your smart home system can enhance your energy management:

  • Set up automated routines to regulate device usage during non-peak hours.
  • Utilize compatible smart appliances that can adjust their settings based on the energy supply.
  • Monitor usage through smart home applications to gain insights and optimize energy consumption.

Measuring Performance and Usage Metrics of EcoFlow

Understanding how to measure your EcoFlow device performance can provide valuable insights:

  • Track the energy consumption rates of your devices and compare them against your EcoFlow output.
  • Utilize the display panel to monitor battery health and charging rates during operation.
  • Regularly check performance metrics to identify usage patterns and adjust for greater efficiency.

Frequently Asked Questions About EcoFlow

1. How long does it take to charge an EcoFlow device?

Charging time varies by model and input method, but many EcoFlow stations can reach full charge in approximately 1 to 2 hours using AC power.

2. Can EcoFlow devices power refrigerators?

Yes, EcoFlow can power small refrigerators, especially during camping or short trips, provided the input energy requirements are met.

3. Is EcoFlow safe for indoor use?

Yes, EcoFlow devices are designed for safe indoor use since they produce no emissions, unlike traditional fuel generators.

4. How long can EcoFlow power a device?

The runtime of EcoFlow depends on the device’s wattage and the capacity of the EcoFlow unit; low-wattage devices can be powered for several hours to days.

5. What maintenance is required for EcoFlow products?

Maintenance includes regular charging, cleaning the ports, and storing the device in a dry place when not in use, ensuring longevity and performance.

Showcasing a high-quality hard case with travel essentials for durability and elegance.

Choosing the Right Hard Case for Your Gear and Travel Needs

Understanding the Importance of a Hard Case

In an era where protection for gear and equipment is paramount, a Hard case becomes an invaluable asset. It embodies durability, security, and organization, ensuring that your essential items are safeguarded against various conditions while on the move. This article explores the importance of hard cases, their various types, key features to consider when purchasing, and the numerous benefits they offer to different users.

Why Opt for a Hard Case?

Choosing a hard case over a soft bag can seem like a trivial decision at first, but it’s one that significantly impacts the longevity and functionality of your equipment. The primary reason users opt for hard cases is the superior protection they provide. Hard cases are often constructed from robust materials designed to withstand impacts, weather conditions, and environmental factors that could otherwise damage delicate gear.

Durability and Protection Features

The durability of a hard case is largely due to its construction material. Polyethylene, ABS plastic, and aluminum are common materials that resist impacts and scratches effectively. In addition, many hard cases feature foam inserts or customizable dividers that cradle gear securely, minimizing movement during transit and further reducing the chance of damage. Whether you’re a photographer wanting to protect expensive lenses, or a musician needing to safeguard instruments, hard cases offer a reliable solution.

Common Misconceptions About Hard Cases

Despite their advantages, some misconceptions prevail about hard cases. A prevalent myth is that hard cases are too heavy or cumbersome to travel with. While heavier than soft cases, many modern designs emphasize lightweight materials, making them relatively easy to carry. Additionally, some believe hard cases are excessively expensive; however, investing in one can save you from costly repairs or replacements in the long run.

Types of Hard Cases Available

Professional Gear Hard Cases

Professional gear hard cases are specifically designed for high-value equipment used by industry experts. Photographers, videographers, and audio engineers often rely on such cases to protect their tools. These cases frequently feature customizable interiors, wheels for easy transport, and rugged exteriors that can withstand harsh environments.

Travel-Friendly Hard Cases

For frequent travelers, travel-friendly hard cases offer a blend of durability and convenience. They often come equipped with features such as retractable handles, wheels, and lightweight designs that make them easy to maneuver through airports and city streets. These cases are ideal for those who need to transport sensitive equipment regularly without compromise.

Specialized Hard Cases for Unique Equipment

Some equipment requires specific protection, leading to the creation of specialized hard cases. Medical devices, scientific instruments, and even firearms each have tailored cases to ensure proper safety and functionality. These cases often incorporate features like airtight seals or additional padding specific to the item it holds, perfect for ensuring that unique equipment remains intact during transport.

Key Features to Consider When Buying

Material Quality and Construction

When selecting a hard case, scrutinizing the material quality and construction is crucial. Cases made from high-densitypolyethylene or polypropylene are usually more durable and resistant to impacts. Review customer testimonials and manufacturer specifications to ensure the hard case meets your personal needs.

Size and Compatibility

The size must also align with the equipment intended for storage. Hard cases come in various dimensions, and accurate measurement of your gear is vital to ensure a snug fit. Many manufacturers offer compatibility guides to assist you in making an informed decision.

Security Features for Travel

For added peace of mind during travel, security features are essential. Look for hard cases with built-in locks, as well as those that are TSA-approved for hassle-free airport navigation. Some cases even feature additional security elements like tamper-proof latches or reinforced corners to deter theft or unauthorized access.

Benefits of Using a Hard Case

Protection Against Environmental Factors

One of the most significant advantages of a hard case is its ability to protect against environmental factors. Sunlight, moisture, dust, and extreme temperatures can deteriorate gear over time, but high-quality hard cases often come with seals that provide additional protection against these elements. This ensures critical equipment is maintained in optimal condition, regardless of where you are.

Organization for Gear and Equipment

Hard cases often come with customizable foam inserts or dividers that allow users to organize their equipment efficiently. This eliminates the chaos that can arise when items are not secured, thereby reducing potential loss or damage. An organized case enhances workflow and accessibility, ensuring that users can retrieve what they need without confusion.

Ease of Transport and Handling

Finally, the ease of transport significantly elevates the overall experience of handling gear. Many hard cases come with handles, wheels, and even backpack straps that facilitate mobility. With the right hard case, transporting delicate equipment from one location to another becomes much more manageable, allowing users to focus on their tasks rather than the safety of their gear.

Frequently Asked Questions About Hard Cases

What materials are best for hard cases?

The best materials include high-density polyethylene, ABS plastic, and aluminum, as they provide excellent durability and protection against impacts.

Can I customize my hard case?

Yes, many hard cases offer customizable foam inserts, allowing users to create tailored compartments for their specific gear.

Are hard cases waterproof?

Not all hard cases are waterproof, but many feature airtight seals that protect against water, dust, and other environmental factors.

How do I choose the right size?

Measure your equipment carefully and refer to manufacturer sizing guides to ensure a proper fit for your hard case.

What brands offer the best hard cases?

While there are many reputable brands, prioritizing durable materials and customer reviews can help you select the best hard case for your needs.